Showing posts with label cleaning. Show all posts

Thursday, 30 April 2020

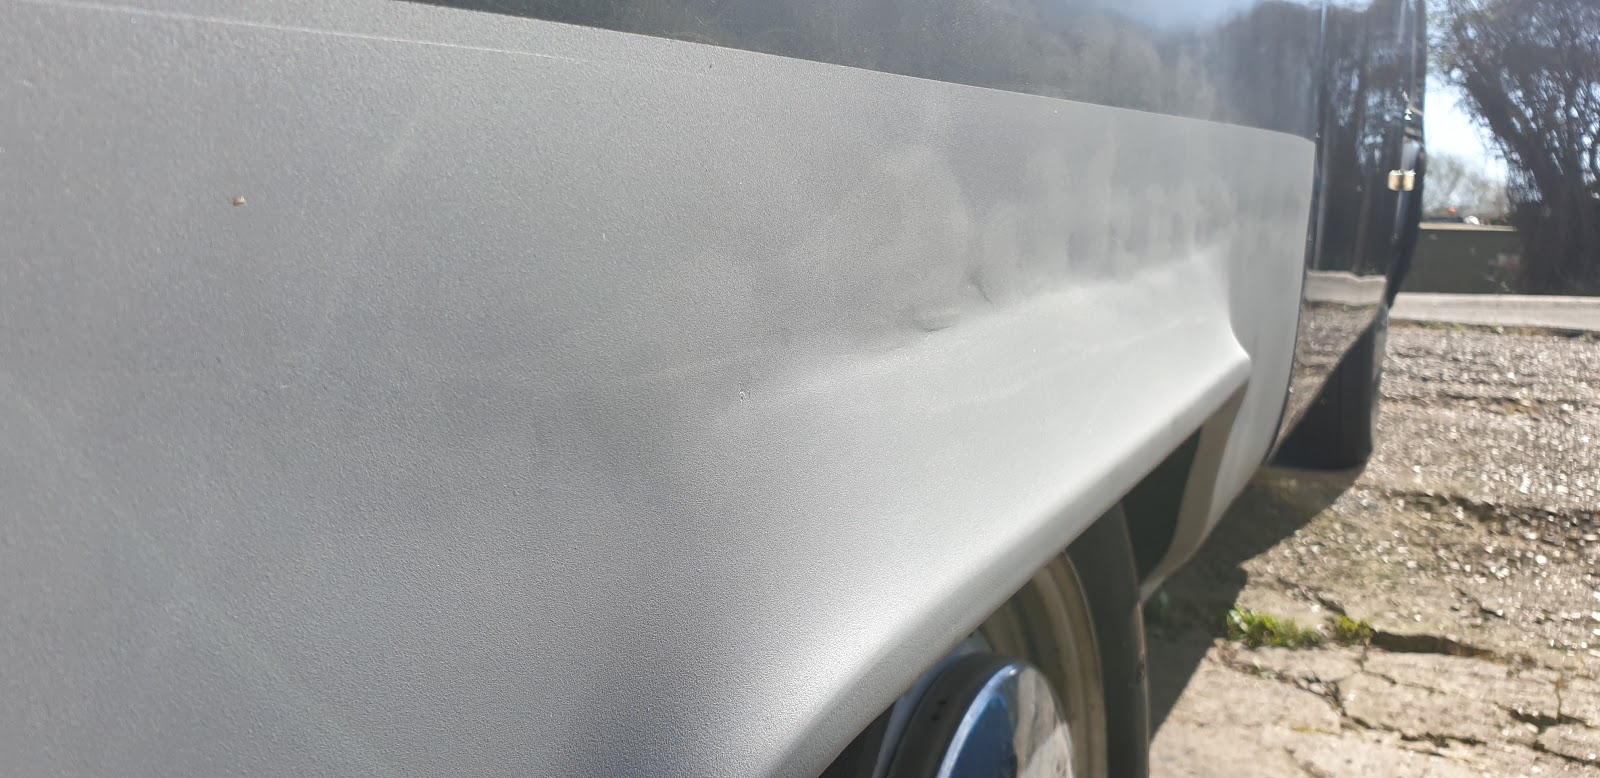
Rear Wheel Arch Painted Finally


1 Year ago (Easter 2019) I finished the Rear wheel arch, sill and Battery tray repairs.

I painted one coat of epoxy primer to make it weather proof to protect it from the elements.

Time past and the weather at the end of 2019 was dreadful and never got / found the time to finally sort the paint out and also complete the final filler.

Here is the rear wheel arch in 2019:


As you can see the weld lines and filler work is far from ideal.

Finally the weather and the Covid-19 lock down events gave me a chance to complete this paintwork!

A mixed blessing but with enforced holidays from work give me a chance to get this finally finished!

So sanded back the epoxy primer and started filler work.


Filler was quite extensive for a few reasons. Firstly the amount of skim filler Danbury put on all the panels! Was 5mm deep and secondly the amount of welding and sealing I had done before


Once the filler was flatted back and pre-paint clean and masking was finished. Ready for primer


2 Coats of Epoxy primer was applied


First 2 coats of Black cellulose paint applied. Not very even coats as had issues with the spray gun setup. Crescent shaped pattern. But went ahead and got two coats on.


Next to flat sand the surface down again. Sill struggled to get an even flat surface!

So I was not happy about the flatting down of the first 2 coats. The surface was rough and uneven still. So continued to flat down to get a level coat. Lots of orange peel and over spray / roughness.


Downheartedly I decided to pick myself up and flatted down some more and repeated the top coats again.

After a few days off I regrouped and picked my motivation back up again.


2 further top coats applied and then 2 more Higher Thinners coats applied. Swapped my HVLP spray gun for a old siphon type gun I had from a air tools kit.

The spray gun was not ideal but at least it could lay down a coat. Quite stripy but I got a film down.

So the surface finish is still suffers from over spray and it's cellulose paint so will need one more flat sanding with 1500-3000 grit and G3, G6, G10 compound and a good polish.

I decided to wait for full hardening of the top coats to ensure that the paint has dried.

Still not got time yet to finish the flast sand & polish....... Updates to come soon........


Tuesday, 28 May 2019

Bodywork - Part 5 - Welding


Quick recap.

Cut, grind, template, transfer, trial, prime steps completed. Now final clean and weld in.

Most panels areas required another trial and also to remove, clean the weld areas. Then a few holes or flange edges to ensure a good fit then tacked into place and then final weld.

There are not loads of photos in this section as I spent most of my time under the van welding and grinding to take photos!


All I can say is that welding upside down under a van with a welding helmet is hard!

But welding i find is strangely addictive!

After all welds are completed and have been ground down... next step finals painting

Stay tuned for Bodywork - Part 6 - Painting 


Wednesday, 17 October 2018

New Engine.... Part 3 - Cleaning

Its been a while waiting for the new engine to be delivered so I have spent some time cleaning & check all the auxiliaries.

Tinware.

Some of the tin had small amount of surface rust on the paint.

Decided to give them a rub down, Jenolite and a fresh coat of POR-15.


Most of the other tin just required a degrease.

Fuel Injectors Testing

The Brazilian Bosch fuel injectors are like "hen's teeth" and cannot be purchased in Europe or even American markets.

They are solely for South American market. So if you want new ones you will have to take a trip to Brazil.

So given this I deiced to use my old ones. But giving them a good clean and checking.

After a small amount of internet searching I found that the standard injector process is a Flow test bench and a ultrasonic cleaning followed by another flow test.

In my quest to become self reliant and also DIY design & build I set out to build my own test bench.

As my wife comments "Are you getting lost in the detail again" I agreed but could not help myself!

So I needed a reliable method of sending pulses to the injectors (unlike most of the on-line DIY where they just apply a +12V  straight from a sparking connection to a car battery! In Flammable atmosphere!)

I found a suitable generator of pulse on Amazon. Costing only £27. This has 4 modes of operation with different pulse widths and duration. Ideal.


Next comes a system of providing a pressurized fuel supply. I watched many videos and pages. The typical set up uses a fuel pump filter and rail to replicate what is in a car.

Did not want to have to purchased all this additional parts. So I decided that compressed air to pressurize a reservoir of "fuel" which connects to a fuel filter (to remove any particles) a pressure gauge and a suitable connection to the fuel injector.

To find a suitable pressure reservoir - Well after trying a few ideas I found a suitable vessel. The disposable gas cylinders used on a MIG welder. They are pressure vessels for gas and can hold enough fluid.

So first task was to drill a second port on the other end, tap a thread and mount a suitable pressure connector for the exit pipe. I also had to remove the ball valve in the regulator end as I wanted to connect directly without a regulator and use the compressed air regulator instead.

A Brazilian bay fuel filter and my pressure gauge fitted and a couple of isolation valves (to stop having to depressurize between injectors.

Then a length of hosepipe and a jubliee clip to hold the hosepipe to the injector.

Then a decision on the fluid required. Initial I started with a flush of injector cleaner through the system without the injector fitted.

Injector cleaner used:


Filling the unit was hard as I did not fit and extra inlet & valve for the filling so removed the air inlet in the top of the reservoir. So I had some 150ml syringes which I could inject into the air inlet to fill. Had to repeat this 4 times which takes a while.

After the flush and dry air cycle I filled it with the test fluid. I was going to use Petrol but went for Paraffin (kerosene in US) as it is cleaner and will help clean the injectors inside.

Here is a photo of the final setup:


Fitted a injector and when all ready to go. Filled and pressurized to 2 Bar. Drove the injector for 1 minute to flush and then emptied the graduated cylinder.

I decide to record the starting voltage and pressure for each injector and then the volume of fluid injected over a 1 minute duration.

After 1 minute the results where:

Injector 1: 39cc
Injector 2: 39cc
Injector 3: 40cc
Injector 4: 39cc

In conclusion the volumes are all within close levels but there is some slight variation. Also the accuracy of the measuring cylinder needs to be improved as it was only in 2cc volumes.

I was happy to see that there is not a massive difference between them.

As part of the injector testing I looked at the spray pattern.

Managed to capture a few flows using the flash on my phone.


What you will notice is that the spray pattern is more stream than jet.

This was worrying but I thought after a clean it could be improved. However on researching the Brazilian Bosch EV6 injector and its part number.

The specification has a Beta angle of only 5 Degrees which is very narrow.


So the Brazilian uses a very narrow pencil stream injector to spray directly onto the rear of the inlet valve.

Who knew as I was expecting a real misting spray but I suppose 5 degrees is correct and a stream.

Fuel Injectors Cleaning

After the testing the injectors where placed in an Ultrasonic & heated bath with the cleaning solution for 2 hours.

Quick Video of the tank & the amount of gunk that came off them. Yuck!


Fuel Injectors Re-Test

Fitted the cleaned injectors back onto the test bench and repeated the test. The results are as follows:

Injector 1: 40cc
Injector 2: 40cc
Injector 3: 40cc
Injector 4: 40cc

So the clean injectors gave 400 cc/min @ 2 Bar

Not sure how to convert that as it depends on duration of pulse and also the type of fluid and pressure the specification was taken with.

As I was only looking for any issues they are all the same and clean which is good enough for me.

I will do a blog on the type of injectors used and there specifications and maybe alternatives if I find any at a later time.

So all parts are clean and ready. Engine arriving soon (Hopefully).... Stay tuned.