Showing posts with label parts. Show all posts

Tuesday, 28 May 2019

Bodywork - Part 2 - Parts & consumables


The previous post showed you how much bodywork Betty required, so I set about on the parts and consumables


Body Panels

I decided to get the following panels from Alan H Schofield

www.alanhschofield.com


  • Inner Rear Wheel Arch Plug/Bung 72-79. N0200241
  • Rear Wheel Arch Right 72-79. 211-809-168D
  • Rear Wheel Arch Tub Closing Panel, Right 72-79. 211-801-564
  • B-Post Outer Skin 68-79 211-809-251
  • Inner Wing Repair Right 68-79. 211-801-506D
  • B-Post Outer Skin Right 68-79. 211-809-251R
  • Outer Sill Under Sliding Door Top Quality 68-79. 211-809-586BQ
  • Inner Sill Right 68-79. 211-801-272
I also had to get a few parts from Just Kampers

www.justkampers.com
  • Inner Centre Sill Offside (Right) VW T2 Bay 1967-1979
  • Closing Repair Panel Offside (Right) VW T2 Bay 1967–1979
Unsure if I needed the inner, centre sills and P post panels but thought that it's better to be safe and have the panels in just in case


Consumables

I have experimented with different rust treatments and paint combinations in the past (Jenolite and POR-15) but have found the results rather mixed.

I decided to switch over the the range of products from rustbusters. They stock a full range of complete rust converters and paint products.

www.rust.co.uk

The main 3 products were as follows:

FE-123 Rust Converter


This converts rust and leaves a protective coating over the metal surface. Just clean back the rust and apply. Drys quick no rinsing and can be over painted.

Weld thru Primer


Weld through primer to ensure that any weld areas have a covering of paint. Mixed up two part epoxy style. Two coats is not that conductive at the actual weld site but does not burn back.

EM121 EPOXY RUST PROOFING PAINT - BLACK


This is now my chosen chassis paint. Having tried POR-15 on rusty areas it works well BUT on fresh steel it does not stick. So I have moved over to EM121 epoxy paint.

Others

A few others materials and consumables were purchased. They included:
  • Tarp
  • Extension leads
  • Fire blankets
  • Flap discs
  • Cutting discs
  • Clamp Magnets
  • Cleaning discs (drill)
  • Fire extinguisher
  • Welding Gas
All consumables purchased and ready to start.....

Booked a few days off work either side of Easter to get cracking..... Stay tuned for Bodywork - Part 3 - Cutting Out

Monday, 20 June 2016

Broken Gearbox - Phase 1 New gearbox

Phase 1 - New Gearbox

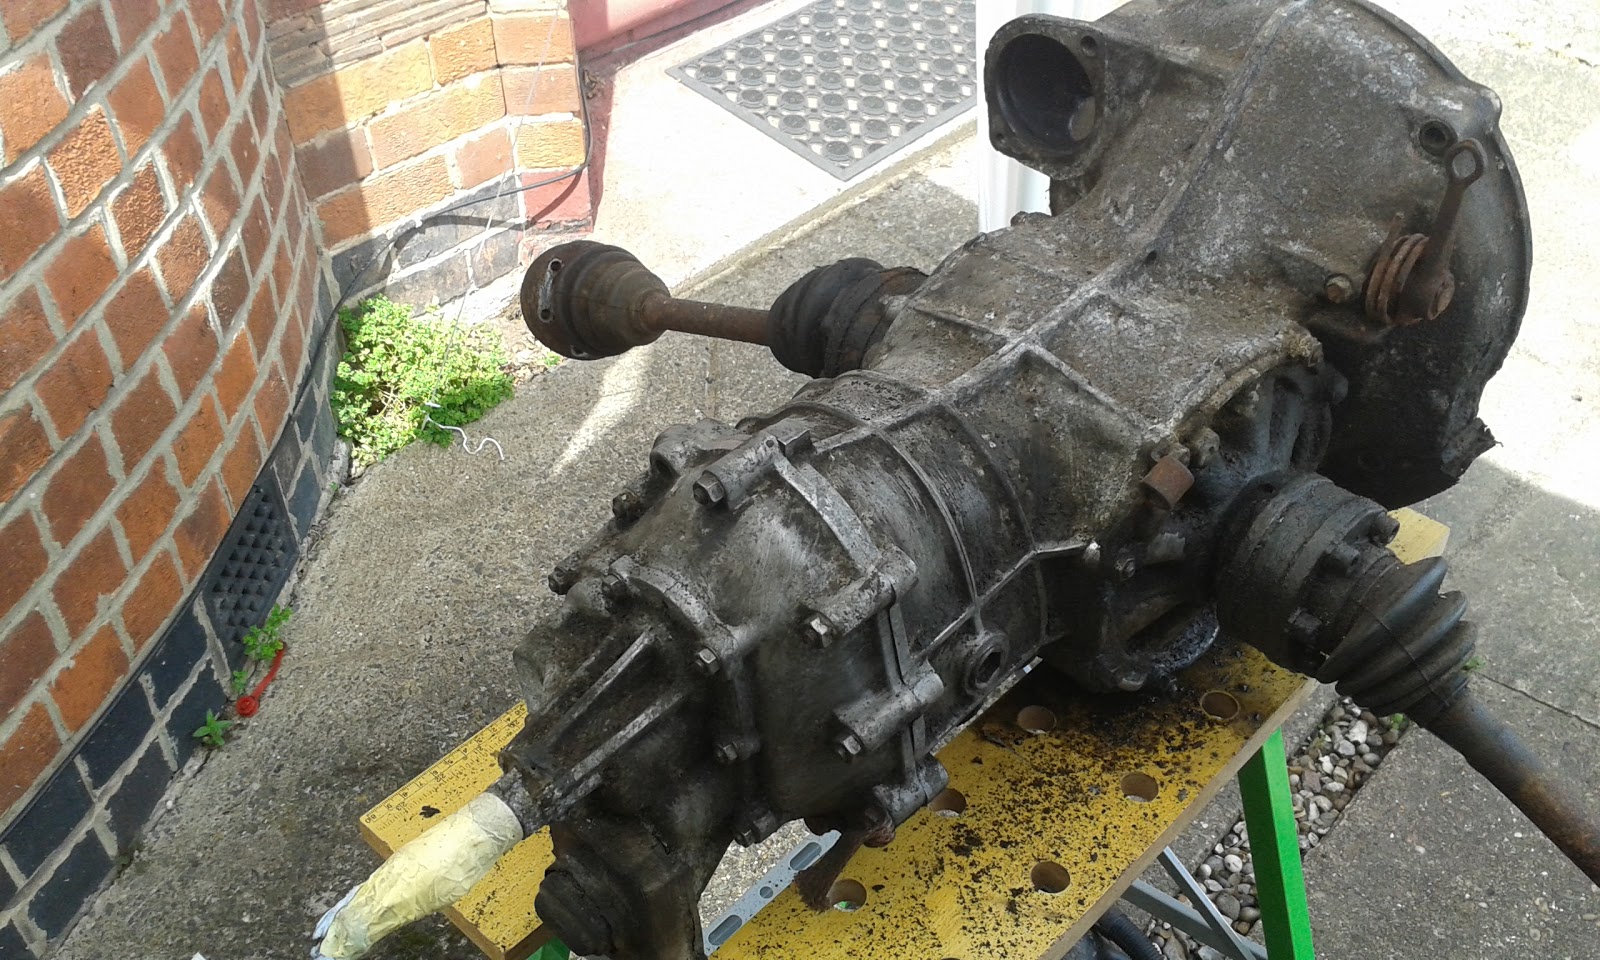
Purchased a 2nd Hand Gearbox from the Beetle breakers. AH code from 1302s Beetle. IRS German built gearbox from the 1600cc beetle (approx 1970s)

This is how it arrived.

AH Code 1302s Beetle Gearbox + CV and driveshafts

Its has sat for 20 years in a garden in the back of a rotting beetle. Supposedly only done 34,000 Miles and the engine was still running.

Its great that I still have the CV and drive shafts as these will come in useful later. Minus the stater and also the clutch return spring has rusted and snapped. Covered in grease (mostly CV and engine oil)

So drained the gearbox oil. Still nice and brown with hardly any metal fragments on the drain plug magnet.

Set upon cleaning it with clutch cleaner and a wire brush.

About half way through having removed some dirt!


Getting Cleaner


Cleaner still after about 4 hours!


So it was time to remove the CV Joints. This would be "normally" done when they are connected to the wheels but I did not have the option.

So improvised some angle steel to hold the outer CV joints in place. Using the 12 Spine socket away the come (remember to clean out the spline nuts of all grease and crud)


That's better nice and clean CV flanges.

Shame I am not as clean


Must be a case of "German Gearbox Measles"

Replacement gearbox stripped down so far. Have ordered a new Clutch return spring. Its going to be fun to fit without trying to take the clutch arm off.

That's it for Phase 1. Replacement gearbox Cleaned and ready.

Phase 2 - Engine out coming soon........ Stay Tuned.

Friday, 3 June 2016

Spares, Tools and pre-journey checklists

Quick new page update today with a list of spare parts, tools and a pre-journey check list.

It's a list of some of the things I carry on board. I carry more than this BUT this will cover the basics.

Where to carry them is up to you but I keep mine in the Danbury side wardrobe. There is a large space underneath where the spare wheel well next to the hook up charger on the air-cooled.

Here is a link to the page for reference.

http://t2bay.blogspot.co.uk/p/spares-and.html


Tuesday, 26 May 2015

Great Parts Diagram Website


I have found a great parts diagram database. Great for most models but the VW section has all diagram which for the Type 2 seem to date back to 1968.

http://www.partsbase.org/vw/

Great for checking parts and also seeing the wonderful diagrams created by VW.