Broken Gearbox - Phase 4a Swap Gearbox Parts
Next phase under progress. This phase is to swap parts from old gearbox and start mounting them on the replacement (new) gearbox.
The parts required for swapping and new replacements are:
- Beetle CV Joints - Clean and inspect for refitting with new boots
- Brazilian CV Joints - Remove from driveshafts (keep) on van
- Brazilian Gearbox - Nose Cone, reverse switch & hockey stick
- Clutch Return spring - Fit new to replacement gearbox
- Clutch Bearing - Inspected Brazilian and going to reuse
- Gear selector boot - reuse boot at front of nose cone
- New Gearbox mounts - Fit EMPI urethane mounts
You could fit all new parts such as Beetle CV joints, Clutch bearing etc BUT I only wanted to replace parts which actually involve removing the gearbox. parts like CV joints can be fitted another time.
My philosophy is only change what you can't change later and the more you change the more things can go wrong.
So the work started. Its currently Wednesday 22/6/16 and its Day 6 since I broke the gearbox. Only working evenings so its taking longer than I would like.
Beetle CV Joints - Clean and inspect for refitting with new boots
Removed from Beetle drive shafts. Marked which side they came from. Wiped up as much grease as possible and soaked in petrol. One side was a little bit more stiff but should be OK. You could replace them with new BUT then I would have old Brazilian outer and new beetle inner CV joints. I will get round to replacing all CV at the same time but in the future. At £50 a joint it is for another time.
The beetle inner CVs will be re-used but treated to a good clean, grease and a pair of new boots. Stored for Phase 5.
Brazilian CV Joints - Remove from driveshafts (keep) on van
Have to remove the CV joints as they are too big to fit the beetle gearbox (Bus ones are 100mm Diameter and Beetles are 94mm) but the driveshaft is identical.
Brazilian CV joints ready for removal:

Spring clips are a pain to get out. My circlip pliers are now bent! (One thing I did notice is that the Brazilian ones have a black rubber gasket on the mounting face)
Drive shafts stay in place:


OLD Brazilian CV joints & Boots:

Messy JOB! Plenty of rags, solvent & gloves used:

Drive Shafts awaiting Beetle CV Joints & Boots:

Brazilian Gearbox - Nose Cone, reverse switch & hockey stick
Time to remove the replacement gearbox nose cone and swap over with the Brazilian one.
11mm bolts are used on Brazilian and 11mm nuts are used on a Beetle gearbox.
Easy swap. Just had to ensure (hopefully) that the hockey stick is located in the selector forks are all in neutral (full pulled out)
New paper gasket & sealant used to ensure it won't leak. Sorry no photos taken of this step but plenty of images on-line.
Here is the differences:
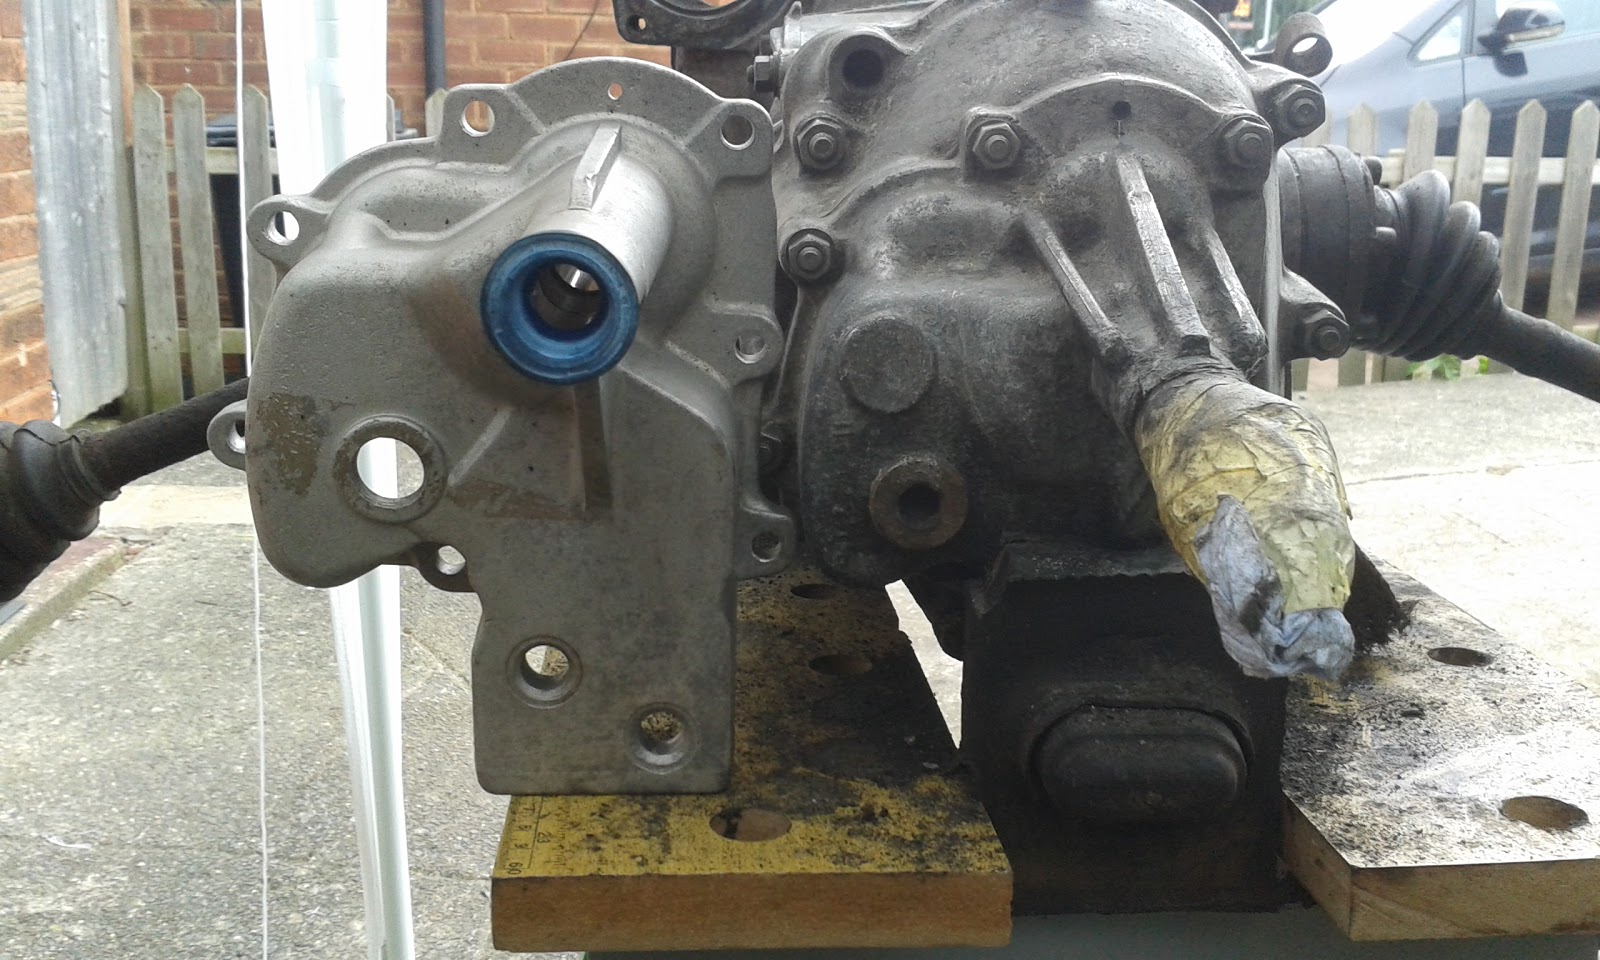
This is a replacement (new) nose cone (left) and the beetle gearbox right. I did not use the replacement as I did not have a replacement hockey stick.
Suggested to grease front seal to ensure a smooth gear selection and also to help seal against leaks.
Suggested to grease front seal to ensure a smooth gear selection and also to help seal against leaks.
Clutch Return spring - Fit new to replacement gearbox
This was fun! Over an hour getting a new spring onto the replacement gear box arm!
The replacement gearbox arm was in good condition but the spring had rusted and snapped.
I found this instruction online which explained the process.

Sounds simple! Well it is not! Managed to slip a screwdriver in 2 and another to loop spring over 3!
Picture of new spring!

Picture of new spring!

Clutch Bearing - Inspected Brazilian and going to reuse
Inspected my old clutch bearing and was not planning to replace clutch plates so just a simple swap over. Made sure to grease ALL clutch parts in gearbox bell housing.
Picture of clutch bearing
Picture of clutch bearing

Gear selector boot - reuse boot at front of nose cone
Simple push on rubber boot! Easy job.


New Gearbox mounts - Fit EMPI urethane mounts
Another horrible job! Should have bought stock gearbox mounts. But went for the stronger less noisy. Aftermarket stuff mostly does not fit!
Front one easy. Just two bolts & nuts.
Rear ones have to be bolted to the bell housing and then the outer bolts to the under gearbox yoke / cradle.
That's the theory BUT the mounts are not curved enough and don't fit the yoke correctly. So 3 of the bolts fit but the outer edge one does not.
Time to give up for tonight! Was hammering & hack sawing 2mm off a bolt at half midnight is a sure way of upsetting the neighbors!
So Phase 4a Swapping over gearbox parts is continuing tonight! so Phase 4b is coming soon..........Stay tuned!
No comments:
Post a Comment