Broken Gearbox - Phase 6 Engine Install
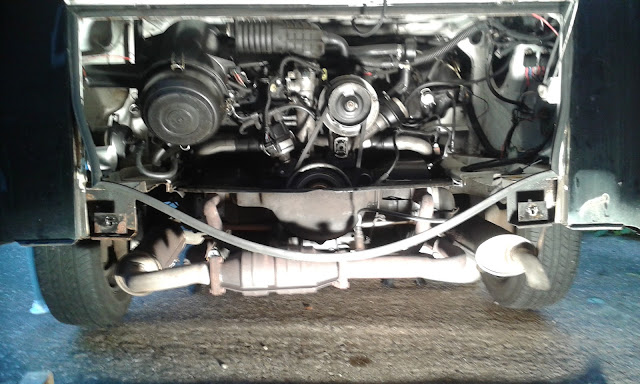
Phase 6 - Last phase. Install the engine connect up and finish!
After completing the new gearbox install on Saturday morning it was time to install the engine!
Texted good Friend Matt (aka Mr Quickfit!) and asked for balancing hands and also his larger trolley jack to help install the engine.
Matt & his van Frank arrived. It so much easier to lift engine and install with another pair of hands.
Despite the 20 degree slope on my drive we managed to lift the engine and roll it towards the awaiting gearbox.
First attempt was slightly tilted at the top (looking back the slope on the drive will mean that as it goes in it needs to be lowered to compensate) but after lower and a little bit of wiggling in slid the engine.
Quickly in with the engine mounting bolts & nuts. Engine was in!
Installed & connected up fuel lines, filter and all associated auxiliaries.
Struggled for an hour trying to get braided accelerator cable into locking bolt on throttle body. Every time we cut the braided cable the cutters crushed the braid meaning it would not go in. In the end enlarged the hole with a drill to give the braids in.
Decided to install battery and start engine without rear tin and valance to confirm we had 4 forward gears, neutral and reverse.
Engine started first time once the fuel had pumped through. No leaks. Sound mean with only the CAT in the exhaust!
Checked clutch and all 4 gears and wheels rotated correctly and reverse was good. It was great to see the wheels move again!
ALL GOOD! No leaks no issues!
Installed exhaust - The rubber mounts are tricky to clip over the hangers BUT Matt just clipped them in straight away and has now been given the nickname "Mr Quickfit!" as I think he might have been an exhaust fitter at Quickfit in a former life!
First Drive Impressions:
Rear valance installed dropped off axle stands and chocks away.
Getting off the drive was very nerve racking but away we went for first drive round the block!
First impressions - Same acceleration in 1st and 2nd. 3rd is much longer allowing me to get over 50 mph before changing. Did not really get much 4th gear yet.
No more crunching going in to 2nd! I always thought this was my gear level adjustment but it was actually the old Brazilian Gearbox (RIP!)
Clutch is a little softer but might need some adjustment to tighten it up. Good gear selection but a little stiff but I am sure once the gearbox oil as got everywhere and starts to wear in. The hockey stick was a little tight on the gear selection forks so this is to be expected.
I am SO PLEASED! All that hard work and late evenings, grease and oil have paid off and the replacement gearbox is so far so good.
Next few days of shakedown testing and a re-check of all bolts and a CV clip to replace.
The Big Thank you!
I could not have done all this without the support of my Family and Friends and I would especially like to thank the following people.
My beautiful, supportive and loving wife Charlotte
You have supported me throughout this giving up your car, driveway, evenings, husband and allowing me to erect the "party tent" while still bring me cups of tea and kind words of encouragement and support through all of this. I could not have done this without you. I love you x.
My Boys
Thanks must go to my two great boys who lost their dad for a week. Thanks for taking an interest and asking about the progress and the thumbs up through the sitting room window. A dad could not ask for better two sons and I am really proud of you both!
Mr "Quickfit" Matt.
Your supportive words and helping hands throughout this have been great. Your ability to clip exhaust mounts on in a flash amaze me. You and your family having to go to bus stop over without us. Your a true Friend.
DazDub.
Online Member of the Brazilian Bay forum who did a Beetle / Brazilian bay gearbox swap a few years ago and wrote it up on the forum. Never met you but thanks for your write up and advice.
Anyway that's all folks!
More updates with progress and any debugging will follow.....


